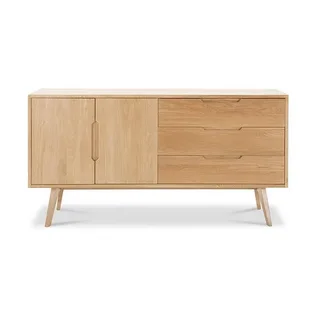
Are you looking to breathe new life into your home without breaking the bank? One of the easiest and most satisfying ways to refresh your space is by giving your old furniture a fresh look. Among the most underrated pieces is the sideboard—versatile, functional, and often overlooked. With a bit of creativity and effort, DIY sideboard makeovers: transform your space on a budget becomes not just a possibility, but a rewarding weekend project.
Why Choose a Sideboard for a DIY Makeover?
Sideboards are incredibly practical. They offer ample storage, can be used in the dining room, living room, hallway, or even as a media console. Because of their solid structure and flat surfaces, they’re ideal candidates for transformations.
Whether your sideboard is outdated, scratched, or simply doesn’t match your current decor style, a DIY makeover can completely reinvent its look—and the feel of your entire room.
Budget-Friendly Ideas for Sideboard Makeovers
You don’t need to be a professional carpenter or interior designer to tackle a DIY makeover. Here are some creative and cost-effective ideas:
1. Paint and Stain
A fresh coat of paint can work wonders. Choose bold hues for a statement piece or go with neutrals for a timeless look. You can also stain wood to restore its natural beauty while preserving its character.
2. Change the Hardware
Swapping out old knobs and handles is a small detail that makes a big impact. Opt for modern metals, vintage brass, or even ceramic knobs to elevate your sideboard’s appearance.
3. Add Wallpaper or Contact Paper
Decorate the inside or outside of your sideboard with patterned wallpaper or contact paper. This adds texture and visual interest without requiring extensive work.
4. Mix Materials
Add new elements like glass panels, metal legs, or even cane webbing. These materials can give your sideboard a modern or boho twist, depending on your style.
Step-by-Step Guide to a Simple DIY Sideboard Makeover
If you’re new to furniture makeovers, start simple. Here’s a basic guide:
- Clean the Sideboard – Remove all dirt and grime so your paint or stain adheres properly.
- Sand the Surface – Lightly sand to smooth rough areas and help paint stick better.
- Prime and Paint – Apply primer if needed, then your chosen paint color.
- Update the Hardware – Attach new knobs or handles after the paint dries.
- Seal the Finish – Use a topcoat to protect your work and enhance durability.
With this simple plan, you’ll quickly see how DIY sideboard makeovers: transform your space on a budget in just a few steps.
Before and After: Small Changes, Big Impact
It’s amazing how minor updates can have a dramatic effect. Whether it’s adding bold colors, fresh hardware, or updated textures, the transformation can refresh your entire room. Many homeowners are shocked at how a once-forgotten piece becomes the centerpiece of their interior design.
Final Thoughts
If you’re ready to refresh your living space without overspending, don’t overlook the power of DIY sideboard makeovers: transform your space on a budget. With a few supplies, a little creativity, and a free weekend, you can turn an outdated piece into a stunning showstopper that’s both functional and beautiful.


